
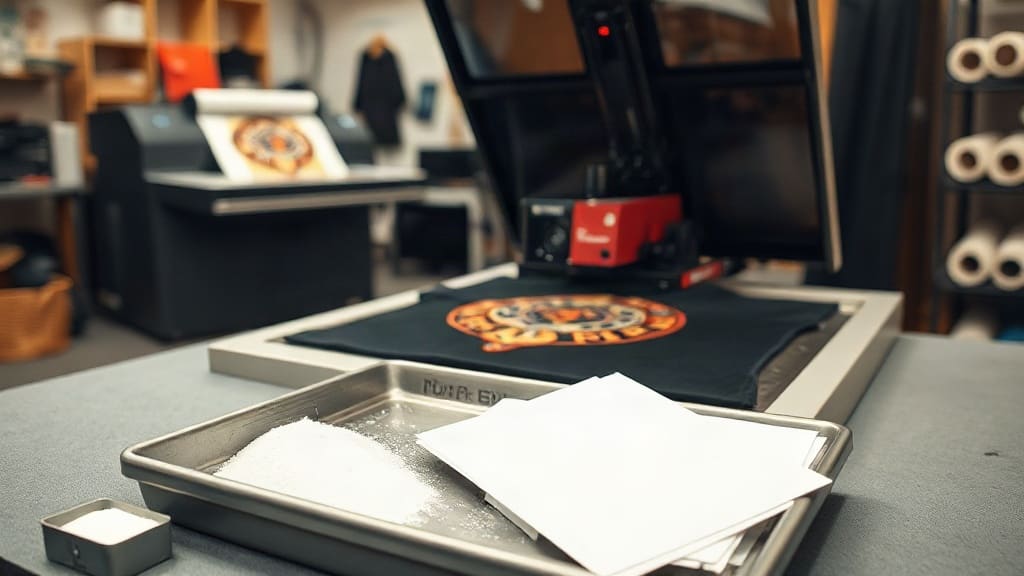
DTF transfers have taken the custom printing world by storm, offering a versatile and cost-effective solution for creating vibrant, durable prints on a wide range of fabrics. Whether you're a hobbyist looking to personalize shirts or a business owner aiming to expand your product line, understanding the ins and outs of DTF technology is essential. In this comprehensive guide, we'll walk you through the process, share practical tips, and help you avoid common pitfalls.
What Are DTF Transfers?
DTF stands for Direct to Film. Unlike traditional screen printing or heat transfer vinyl, DTF transfers involve printing a design onto a special PET film using a DTF printer, then applying it to fabric with a heat press. The process is similar to heat transfer paper, but the key difference lies in the film and the adhesive powder used, which results in a softer, more durable print.
Initially, DTF was primarily used for polyester fabrics, but with the right pre-treatment, it works beautifully on cotton, blends, and even dark garments. This versatility has made it a favorite among custom apparel creators.
How Do DTF Transfers Work?
The DTF process can be broken down into a few simple steps:
- Printing: Your design is printed in reverse onto a special PET film using a DTF printer equipped with white ink. The white ink acts as a base, ensuring colors pop on dark and light fabrics alike.
- Applying adhesive: A hot-melt adhesive powder is applied to the wet ink. This powder is what bonds the design to the fabric.
- Drying: The film is passed through a dryer or heated to melt the adhesive powder, making it tacky.
- Pressing: The film is placed on the garment, and a heat press applies pressure and heat (typically around 320°F to 340°F) for 10-15 seconds.
- Peeling: After pressing, the film is peeled away, leaving a vibrant, soft print behind.
This process might sound complex, but once you have the right equipment, it's surprisingly straightforward.
Why Choose DTF Transfers Over Other Methods?
There are several reasons why DTF transfers have become so popular:
- Versatility: DTF works on a wide range of fabrics, including cotton, polyester, blends, and even nylon (with careful testing). You can print on shirts, hoodies, tote bags, and more.
- No weeding required: Unlike vinyl, DTF transfers require no weeding. This saves hours of labor, especially for intricate designs.
- Excellent color vibrancy: The white ink base ensures that colors remain bright and true on dark fabrics.
- Soft hand feel: The prints are thinner and more flexible than vinyl, making them more comfortable to wear.
- Durability: When applied correctly, DTF prints can withstand numerous washes without cracking or fading.
- Cost-effective for small runs: Setting up a DTF system is more affordable than screen printing if you're doing small batches or custom orders.
Essential Equipment for DTF Printing
If you're considering adding DTF to your business, you'll need a few key pieces of equipment:
- DTF Printer: This is essentially a modified inkjet printer that can handle white ink. You can either purchase a dedicated DTF printer or convert an existing printer (like the Epson EcoTank) with a DTF conversion kit.
- PET Film: This is the carrier film that your design is printed on. Make sure to choose a high-quality film that's compatible with your printer.
- Adhesive Powder: A fine thermoplastic powder that melts during the pressing process to bond the ink to the fabric.
- Heat Press: A clamshell or swing-away heat press is essential for transferring the design. Some people use a conveyor dryer for production, but a heat press is more accessible for small operations.
- Oven or Dryer: To cure the adhesive powder after it's applied, you'll need a way to heat the film before pressing. A dedicated DTF dryer or a simple convection oven can work.
Step-by-Step Guide to Using DTF Transfers
Now, let's dive into the practical steps. Whether you're using pre-made DTF transfers or creating your own, the application process is similar.
1. Prepare Your Design
Your design should be high-resolution (at least 300 DPI) and ideally in PNG format with a transparent background. If you're printing your own, you'll need to mirror the image (flip it horizontally) before printing, because you'll be pressing the film against the fabric and peeling it off.
2. Print and Powder
Load the PET film into your DTF printer and print your design using the CMYK + White color settings. Once printed, immediately apply a generous layer of adhesive powder over the wet ink. Shake off the excess and set the film aside.
3. Cure the Adhesive
Place the film in a dryer or oven at around 250°F (120°C) for a couple of minutes, or until the powder turns clear and glossy. This melts the adhesive and makes it sticky.
4. Press the Transfer
Preheat your heat press to about 320°F (160°C). Place your garment on the press, lay the film on top with the design facing down (the white ink side touching the fabric), and apply firm pressure for 10-15 seconds. For dark fabrics, a little more pressure and time might be needed.
5. Peel and Finish
After pressing, peel the film away while it's still warm. Peel slowly and carefully to avoid lifting any ink. Once peeled, your print is ready. You can optionally apply a light press with a Teflon sheet to enhance durability.
Tips for Perfect DTF Prints
Getting consistent, high-quality results takes practice. Here are some tips I've learned from experience:
- Use a Teflon sheet: When pressing, place a Teflon sheet or parchment paper between the heat press platen and the film to prevent scorching and protect the film from sticking.
- Watch your temperature and time: Too much heat can cause the adhesive to over-melt and bleed, while too little will lead to poor adhesion. Experiment with small test pieces to find the sweet spot for your specific setup.
- Pre-press your garments: Pressing the shirt for a few seconds before applying the transfer removes moisture and wrinkles, leading to a better bond.
- Choose the right film: Not all PET films are created equal. Some are thicker and more durable, while others are better for high-detail prints. Test a few brands to see which works best with your printer and ink.
- Maintain your equipment: White ink is notorious for clogging. Make sure to shake your ink cartridges regularly and run cleaning cycles on your printer to avoid costly blockages.
Common Mistakes and How to Avoid Them
Even seasoned printers run into issues. Here are some common problems and solutions:
- Print comes out faded: This usually means your white ink layer is too thin. Increase the number of white ink passes or adjust your print density settings.
- Adhesive not sticking: If the powder isn't melting properly, your drying temperature may be too low, or you're not leaving the film in the dryer long enough.
- Peeling damages the print: If you peel too quickly or when the transfer is cold, you can crack or lift the design. Always peel warm and at a 45-degree angle.
- Cracking after washing: This is often due to under-pressing or using low-quality adhesive powder. Ensure you're applying enough pressure and that the powder is fresh and high-quality.
Scaling Your Business with DTF Transfers
If you're looking to grow your custom apparel business, DTF transfers offer a low-barrier entry. You can start with a small setup and expand as demand grows. One of the biggest advantages is the ability to print on demand, eliminating the need for large inventory.
Consider offering DTF transfer services to other local businesses, or partner with other printers who may want to outsource their DTF needs. Since DTF is still relatively new, there's a growing market for high-quality transfers.
When scaling, focus on consistency. Invest in a good heat press, maintain your printer diligently, and always test new film or powder batches before using them on customer orders.
DTF Transfers vs. Other Popular Methods
To help you decide if DTF is right for you, let's compare it to other common methods:
- DTF vs. Screen Printing: Screen printing is more cost-effective for large runs (over 100 pieces), but DTF is cheaper for small orders and offers more flexibility for full-color designs.
- DTF vs. Vinyl: Vinyl is great for simple designs and single-color text, but DTF offers better color gradients and no weeding, saving time.
- DTF vs. Sublimation: Sublimation only works on polyester and light-colored fabrics, while DTF works on virtually any fabric, including dark cotton.
Frequently Asked Questions
How many washes can DTF transfers withstand?
With proper application, DTF prints can last for 50 or more washes without significant fading or cracking. To maximize durability, wash garments inside out in cold water and avoid using fabric softeners.
Can I use DTF transfers on 100% cotton?
Yes, DTF transfers work exceptionally well on 100% cotton. However, the fabric must be able to withstand the heat and pressure of the press. Cotton is ideal because it's breathable and absorbs the adhesive well.
What is the best temperature for pressing DTF transfers?
Most DTF transfers require a temperature between 320°F and 340°F (160°C to 170°C). However, the exact temperature can vary depending on the film and adhesive powder you're using. Always follow the manufacturer's instructions and test on a scrap garment first.
Do DTF transfers work on dark fabrics?
Absolutely. In fact, DTF was originally designed to solve the problem of printing on dark garments. The white ink base ensures that your colors remain vibrant and opaque, regardless of the fabric color.
Can I reuse the PET film after pressing?
No, the PET film is a one-time use carrier. Once you press it, it becomes brittle and cannot be reused. However, you can recycle the film with other plastic waste.
Final Thoughts
DTF transfers are a game-changer in the custom printing industry. They offer an accessible entry point for beginners and a scalable solution for businesses looking to expand their offerings. With the right equipment and a bit of practice, you can produce professional-grade prints that rival more expensive methods.
Remember, the key to success lies in mastering your process: from preparing the design to maintaining your equipment. Take the time to experiment with different fabrics, temperatures, and pressing times to find what works best for you. And don't be afraid to invest in quality materials, as they'll pay off in the long run.
Whether you're printing a single shirt or gearing up for production, DTF technology gives you the flexibility and quality to bring your ideas to life. So why wait? Start exploring the world of DTF today and see the difference it makes in your prints.